Water tanks are everywhere.
We use water tanks in many industries, from oil and gas to agriculture. That’s why remote water tank monitoring is important. To maintain control of their operations, engineers and managers need to know how much water is in their tanks at all times. Many also use tank-level data to inform other processes, like turning on pumps or triggering service tickets, or to boost sustainability.
Remote tank monitoring can seem challenging at first. If you do it the wrong way, it can even be expensive. Fortunately, it’s actually pretty simple (and cheap) if you have the right tools. And if you’re looking for a resource that explains how to monitor tank water levels, you’re in the right place.
This blog post covers the 7 basic steps of monitoring water levels in industrial tanks. These steps include the following (click to jump to a particular step):
TL;DR - these steps can be intimidating for those who are new to setting up remote monitoring systems. We encourage you to read on to learn more about the process. If you just need an easy, affordable water tank monitor that works out of the box, check out our tank monitoring solution.
This first step can feel like the hardest.
There are so many sensors out there at various price points. Water level sensors differ by accuracy, material composition, form factor, and more. We wrote a previous blog post on the best tank level sensor, so you can check that out for a more thorough answer.
Fortunately, picking sensors for water tanks is easy because most are compatible with water. We personally recommend hydrostatic water level sensors for water tank monitoring. They’re reliable, low-cost, and easy to install.
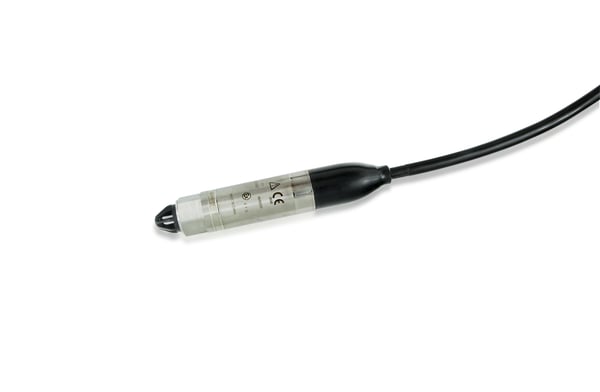
Hydrostatic water sensors work very well for monitoring water tank levels.
After you’ve purchased your water level sensor, it’s time to get it installed.
If you’re using a hydrostatic sensor, the installation process is fairly simple. These sensors measure the weight of water above them. So you’ll either need to submerge them or install them on the discharge line at the bottom of your tank.
Note: In most cases, the discharge line is really the “true bottom” of your tank because the water below the discharge line is inaccessible. Installing sensors there can be a good idea in certain cases.
You also need to consider where to mount your transmitter. A transmitter is a device that converts sensor signals into data you can use later. Some tanks will already have ports for transmitters. Others might require you to create a new one.
Here’s an example of how to install a hydrostatic sensor and transmitter on top of a water tank with an existing 2 ¼” NPT threaded port. These ports are common on water tanks.
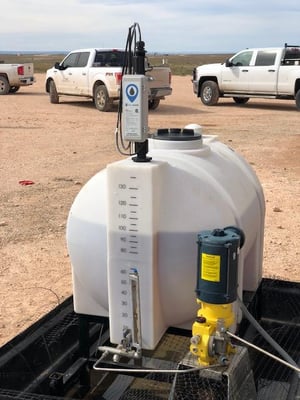
On this plastic tank, a new 2 1/4" port had to be created in order to mount the transmitter and sensor. WellAware Tank Monitors like this one come with mounting kits to make installation easy.
The third step is to calibrate your water level sensor.
Your approach will depend on your specific sensor and installation method. But the goal is to “tell” the sensor and transmitter how to interpret what you are measuring.
To do this, you need to calibrate your sensors to the water level (inches or centimeters) AND water volume (gallons or barrels) in your tank. After all, most people care more about the volume of water in the tank, not the level.
WellAware Water Tank Monitors come with an easy-to-use mobile app that makes wireless calibration a breeze even on complex tanks.
Let’s start with water level. The level calibration depends on two factors: The first is the weight of the water above the sensor in the tank. The second is the specific gravity of the water. “Specific gravity” in this context is just a fancy word that describes the density relative to water. Fortunately, the density of water relative to itself is almost always 1 (or close enough). This makes for some easy math. 😊
Note: If you are dealing with water with a lot of dissolved or suspended solids, like saltwater, for example, the specific gravity can be significantly different from 1!
The volume calibration depends on the shape of the tank. Calculating volume is easy for tanks with simple shapes like boxes or vertical cylinders.
Those with complex shapes (horizontal cylinders, cone-bottom tanks, etc.) require harder math and more measuring. Operators will often fill these tanks and take level-volume readings manually. Then they’ll build out “strapping tables,” which are basically lists of level-volume pairs. Strapping tables are helpful because they allow you to look up volumes at different levels or vice versa, but they can be a pain to create!
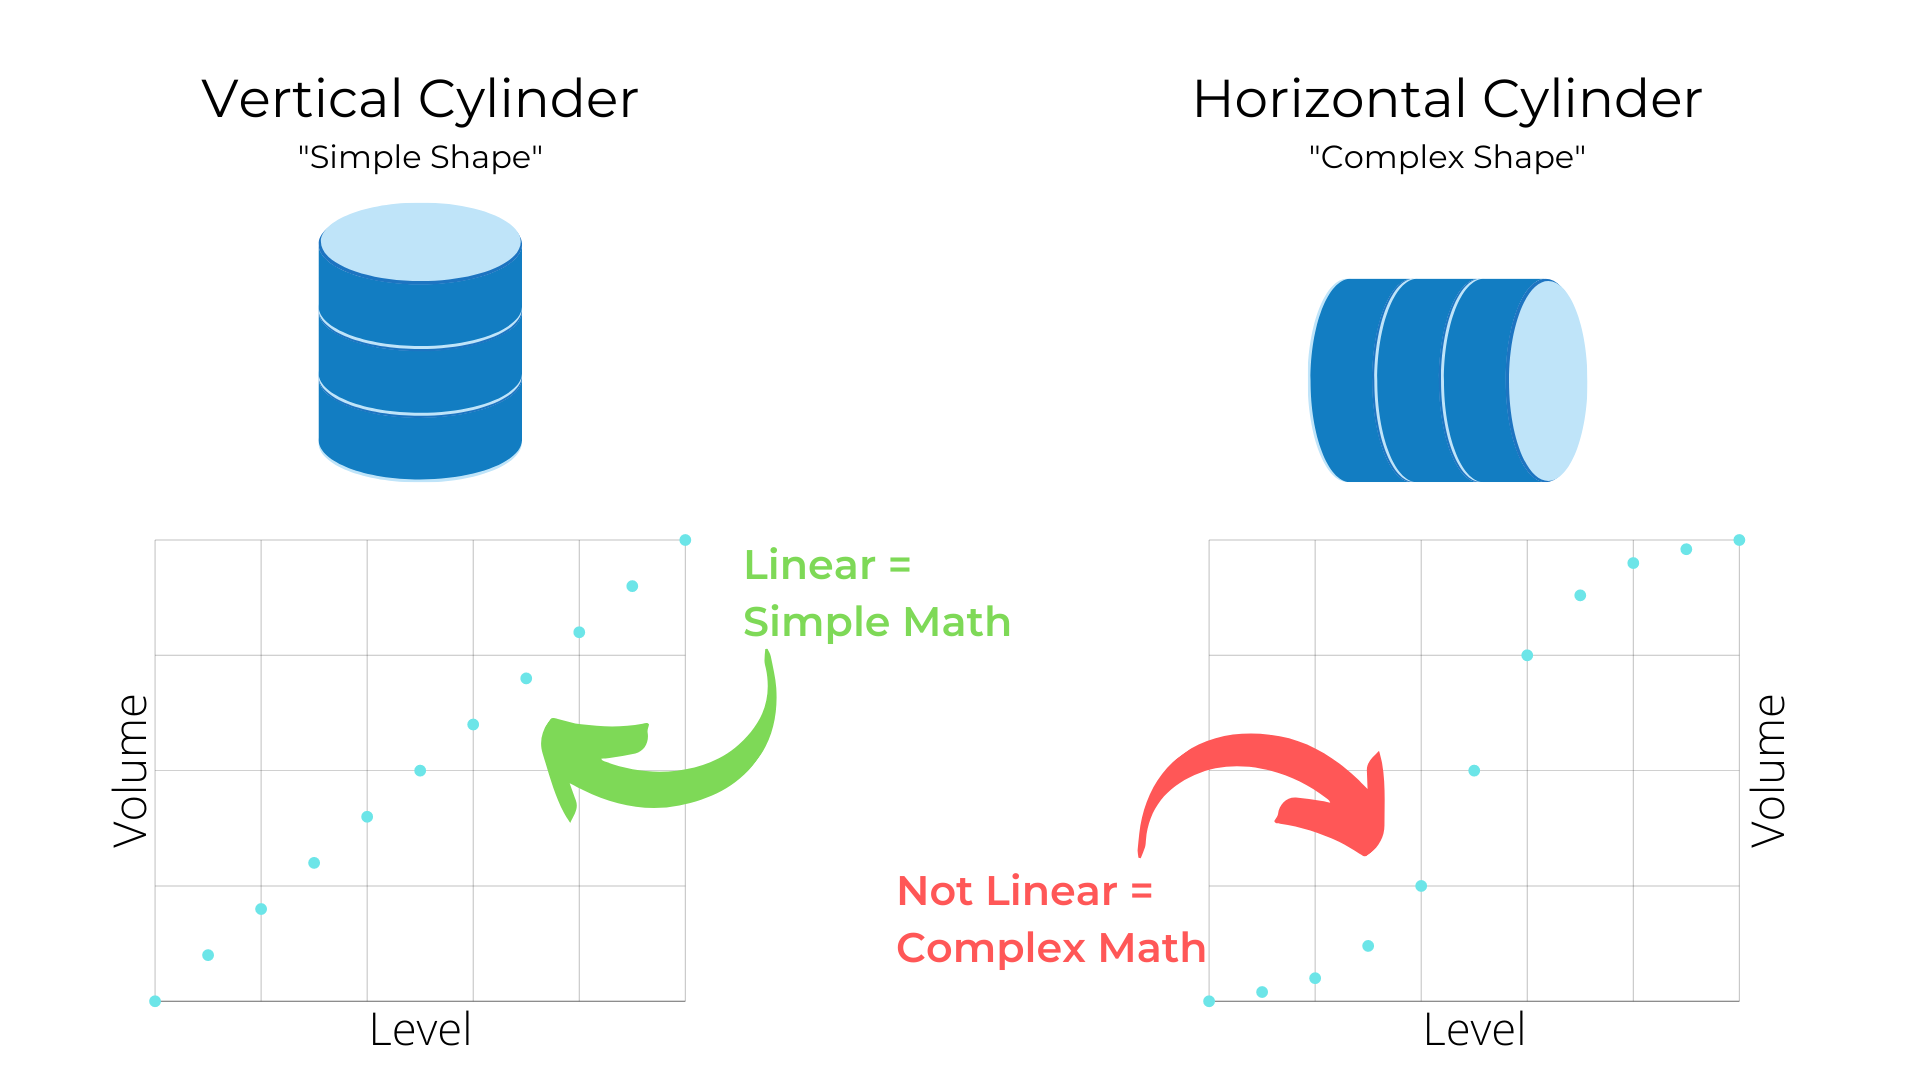
Simple shapes like vertical cylinders allow for simple conversions from level to volume, but more complex shapes like horizontal cylinders require a bit more math.
Next, you’ll need a way to transfer data from your water tank monitor to the internet. This allows you to track water levels remotely. We do this with network gateways. Examples of network gateways included modems and routers.
Network gateways connect your sensor to the internet by acting as a bridge for your data. They are included with sensor transmitters in some cases. For instance, WellAware tank monitors come with integrated sensors, transmitters, and network gateways with data plans included. If your transmitter doesn't have a gateway, you’ll need to purchase one separately.
Network gateways must have analog or digital inputs that can read sensor outputs to connect to sensors. The most common outputs are 0-5V, 4-20 mA, or Modbus. To connect to the internet, network gateways need to have a modem or a router.
Next up: establishing connectivity for your wireless water tank monitors.
You can use an existing network if available. WiFi, for example, can be a good option if you already have it set up at your facility. Keep in mind, however, that WiFi has known security risks. If you connect a new device to your WiFi network, it becomes another “attack plane” for would-be hackers to access other sensitive information on that network.
For remote sites without existing networks (or if you want to keep data separate from your personal networks), you’ll likely want a public wide area network (WAN) like cellular or satellite. At WellAware, we like cellular - it’s cheap, everywhere, and offers good indoor penetration. It also has plenty of bandwidth to handle high tank data volumes.
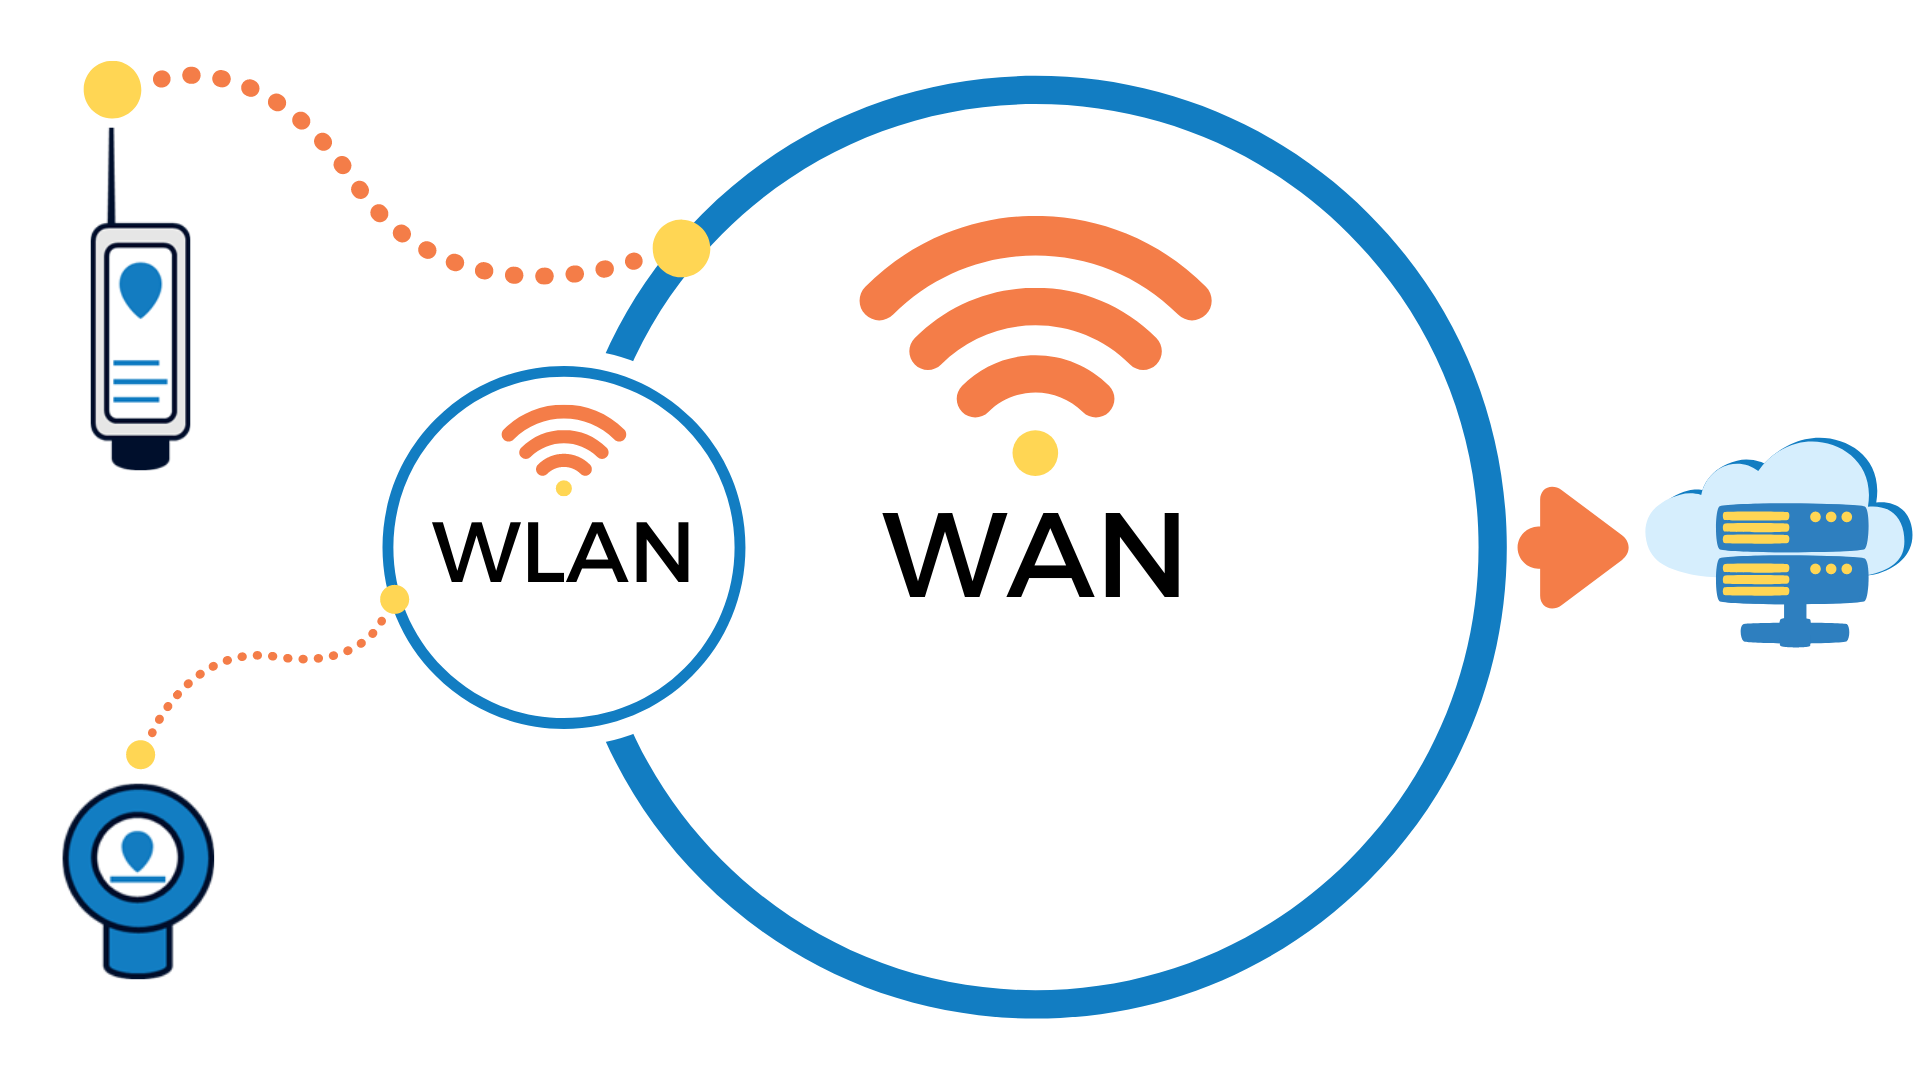
Cellular is a type of "wide area network" (WAN) that connects your wireless tank monitors to the internet. WiFi is a "wireless local area network" (WLAN) that requires additional hardware and a service plan to connect to the internet.
If you go with cellular, you’ll need a SIM card and a data plan. You can activate your SIM and get a data plan from your preferred cellular provider. Your provider should also be able to help you get data flowing between your sensors and databases by offering a device management platform.
Note: Although cellular networks are public, they can include private features. Consider setting up a private APN - which keeps your water tank data separate from the public internet - if security is important to you. You’ll get the benefit of protecting your water tank data from snoopers.
You can skip this step if you just want to see the current water level in your tank...but we don’t recommend it! Historical trend data can be valuable. We’ll talk more about this shortly.
There are many ways to set up a database. For instance, you could go with a cloud database. Companies like Amazon Web Services (AWS) make this easy and cost-effective.
Another option is to create a database on your own server or computer. But database engineering is not for the faint of heart. We recommend working with an IT service provider or an integrated tank monitoring solution provider instead.
The final and most rewarding step is connecting your software tools to your database. You’ll be able to see your water tank levels from anywhere, whenever you need them! Imagine sipping margaritas on the beach...soaking in the sun...checking water tanks (you mean that’s not what you do on vacation??).
You could build or buy “Business Intelligence” or SCADA software. These products allow you to visualize tank data from your database. Remember, the end goal is to be able to use built-in features that create value from your water tank data, both current and historic.
These features may include:
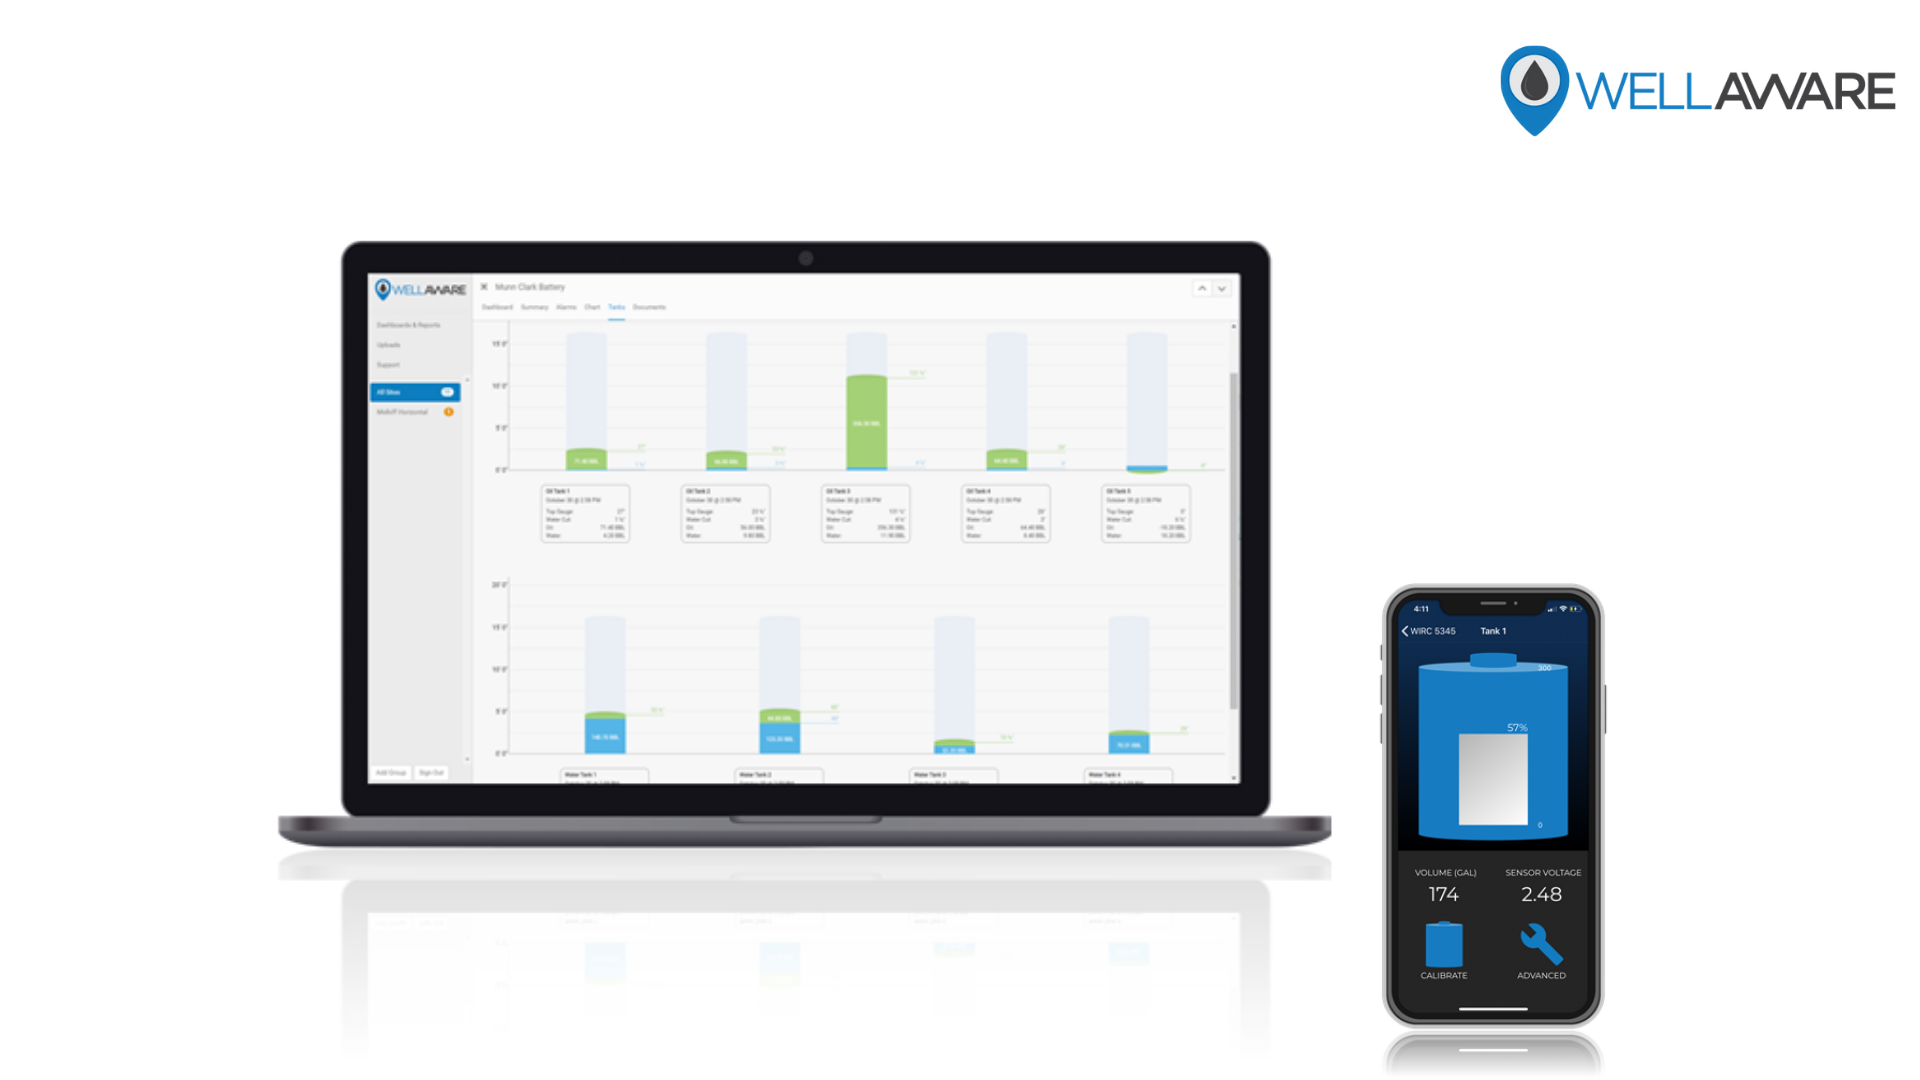
Water tank monitoring software should include features like alarming, tank visualizations, trend screens, and simple calibration wizards.
The best way to get this all in one place is through an integrated tank monitoring solution provider.
Why? They’ve mastered these steps.
Working with a tank monitoring solution provider, like WellAware, can be cost-effective as well. If you don't have a remote monitoring system in place, or if your remote monitoring system is aging, a full-stack water tank monitoring solution will likely be the best financial option.
Don’t worry if this is a bit overwhelming.
WellAware has helped companies of all sizes monitor their water tanks, no matter the complexity. We make the process simple and easy by providing everything you need:
Our water tank monitors install in minutes. You’ll go from opening a box to seeing water levels on your phone in less than an hour.
And to give you an extra boost of confidence, our equipment is backed by a lifetime warranty under contract. If your water tank monitor breaks, we’ll fix it so long as you are our customer.
Your water tank data is also guaranteed to be reliable under our service agreement. So instead of dealing with the hassles of setting up and managing a water tank level monitoring system, you’ll be able to focus on what you can improve in your operations now that you have accurate, reliable water tank level data streams flowing directly to your screens!
Click here to learn more about our wireless water level monitoring system today.