 Tank level monitoring systems are great for industrial companies that want to mitigate problems, automate processes, and more. However, to add value, tank level monitors have to provide accurate and reliable data. And one of the most important factors in making this happen is getting installation right.
A proper installation will set your smart tank sensors up to create trustworthy data for years. Bad installations, on the other hand, can really screw up your operations.
Fortunately, we’ve spent a lot of time setting up tank level monitors, and we are here to share some of the essentials for a successful install.
Before wireless technology really took off, people connected tank level sensors directly into their programmable logic controllers (PLCs) or distributed control systems (DCS). Devices would connect to a local intranet or, in some cases, a gateway or router. Those days are long gone.
If you are installing tank level sensors today, there is almost no reason not to go wireless. Wireless tank level sensors cut down on installation time and material costs significantly, because you don’t have to run cables anywhere!
Those against wireless will sometimes claim that it isn’t as reliable or secure as wired technology. This can be true, but only if installations aren’t done properly. When done right, wireless is more cost-effective, efficient, and frequently more reliable than wired infrastructure. It’s also important to note that security depends more on how you set up your network - wired or wireless - and less on whether you choose wireless level sensors.
And fortunately, there are plenty of ways to secure wireless networks (e.g., encryption, VPNs, proprietary protocols, authentication, etc.). Be sure to do your homework and take whatever steps you need to secure your tank level monitors properly. We won’t go into much more detail here about what else is involved in tank monitoring infrastructure, but you can read more on our blog post dedicated to that topic here.
The second way to ensure your installations are successful is to know your tank level sensor - and the application you are using them for - inside and out. We spent an entire post talking about how to choose a tank level sensor for the purpose of collecting trustworthy data, so we won’t touch on that here. Instead, we’ll focus more on what you need to know for installations, specifically.
As we’ve mentioned before, tank level monitoring sensors measure tank liquids. Obviously, liquids vary widely in their composition, chemical makeup, etc. If your sensors’ materials aren’t compatible with your liquids, you’ll end up with a host of problems, like corrosion, cracking, or fluid ingress, down the road.
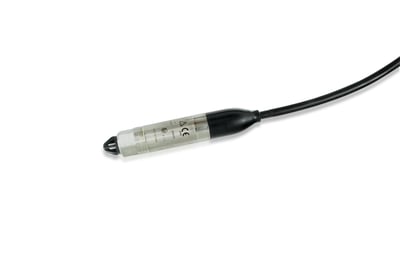
Ensuring fluid compatibility on sensor wetted materials is critical. This sensor has a 316L stainless steel housing and diaphragm with a Kynar coated cable gland and jacket.
You can avoid these issues by getting a material and safety data sheet (MSDS) for your liquids and cross-referencing that with any sensors you are considering. For example, we could use this material compatibility chart and see that a 316L stainless steel sensor would be compatible with diesel fuel, but not 100% sulfuric acid. You need to know this type of information upfront!
Also, remember to consider all materials that will sit in your fluids, such as sensor housings, cables, and floats. Sensor manufacturers usually call these other components “wetted parts,” so look out for that language when checking for compatibility.
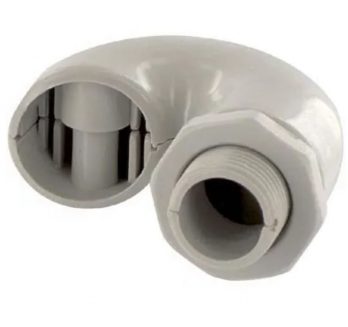
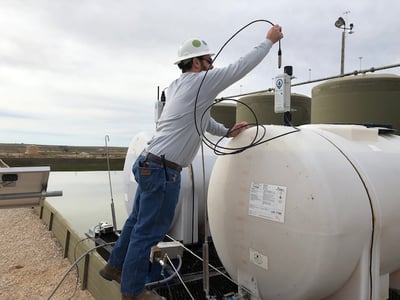
How you mount your tank level monitors can affect accuracy, reliability, and costs significantly. Some tanks have prefabricated threaded ports where you can easily screw in wireless sensors. If your tanks do, you may only need a reducer bushing like this one for installation.
But, if your tanks don’t have available ports, you’ll have to create your own. There are a couple of ways to do this. If your tanks are made of plastic or fiberglass, you can use a hole saw and a threaded bulkhead fitting and gasket. Our team uses these specific mounts for installing sensors on plastic chemical tanks. Make sure to prevent scraps of plastic falling into your tank when you drill the hole. You can collect those with a large PVC end cap or similar.
Unfortunately, you can’t always use this approach to add ports to metal tanks, especially in hazardous environments where generating sparks can create an explosion risk (more on this later). You can, however, install a wye-fitting or similar to convert one port into two and get around the mounting roadblock.
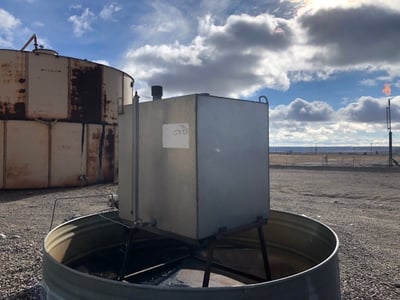
When installing tank level sensors on steel tanks, you may need to modify or split existing openings to make room for the sensor mount.
Placing your sensor in the correct spot is crucial to getting a good calibration and accurate data. And where you place depends on the specific sensors you need.
For example, you’ll want to place hydrostatic sensors at the bottom of your tank. If you end up submerging your sensors, we recommend using some kind of weight to keep them at the bottom of your tank. Occasionally, cables can expand and contract with temperature changes, causing sensors to “lift.” This can affect level readings, which is why many sensor manufacturers also sell weights.
If you place sensors on an external fitting, they need to be as close to the bottom of your tank as possible. Of course, if you are mounting devices on a fluid discharge line, you can treat this placement as the “bottom” of the tank, as liquid below it will be inaccessible. Just keep in mind there will still be some liquid underneath your sensor that won’t show up in measurements.
For ultrasonic and radar sensors, you need to make sure sensors are perfectly perpendicular to fluid surfaces after installation. This way, sound and radar waves can bounce back directly to your sensing element. We also recommend not putting these sensors too close to tank walls, as doing so can cause interference.
Furthermore, you should maintain a “blanking zone” between sensing elements and the top of your liquid. If you do plan to fill your tank to the brim, you need to extend the height of the sensor using a threaded nipple or pipe extension.
Float sensors require a bit more work on the front end to ensure proper installation. Sensors typically need to be manufactured precisely to your tank dimensions and mounted so that the float sensor positions align with true level measurements. Depending on the manufacturer, some float sensor lengths need to be longer than the actual tank height, so keep in mind that a 10 foot float might not fit a 10 foot tank. Just ask your vendor for confirmation.
Outside of these guidelines, there are special considerations to keep in mind.
If you need to place sensors in mobile or turbulent tanks, we recommend installing a stilling well, a tube that extends down into tanks to prevent sloshing and improve readings.
If you use hydrostatic sensors, your tanks must be vented. In clean environments, you could just drill a small hole in your tank or use bug vents like this to prevent pressure buildup that would otherwise cause erroneous readings. This is very important, even in tanks that aren’t designed to hold pressure.
Bug vents, like this one from Bud Industries, can allow pressure release in tanks while preventing moisture, dust, and bugs from entering the tank.
For instance, increasing the temperature in a non-vented 500-gallon vessel by 20 degrees can increase pressure by 0.2 PSI. Although that might not seem like much, it would correspond to ~5 inches of error in a tank level reading!
The last thing to remember to maximize installation success is safety. Installing tank level sensors right will align with your company’s safety culture and keep incident rates low. With tank level sensor installations, these are two things you should keep in mind: hazardous area ratings and grounding.
Certain industrial environments carry hazardous ratings that limit the types of equipment that can be installed inside of them. These ratings are typically provided by national or international standards bodies, like OSHA in the US and EU in Europe.
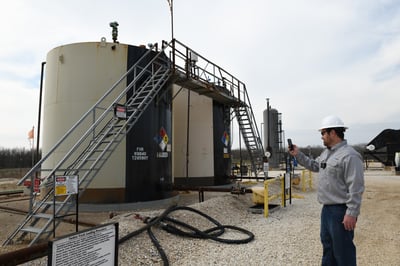
Installing tank level sensors in hazardous locations - like oilfield production sites - require sensor certifications that ensure safety in that environment.
In most cases, hazardous ratings are designed to prevent explosions in areas where ignitable materials, like gases, vapors, or dusts, exist. These ratings help operators understand what they can safely install in their physical environments.
Additionally, tank level sensor manufacturers have to submit their devices to independent testing labs for certification for use in these hazardous areas. Sensors are certified and designated with badges that indicate where operators can install them safely. For example, a crude oil tank might sit at a production well site that could be considered a Class I, Division 1 by OSHA’s definition. You would want to make sure your tank level sensor was independently certified to operate in this specific environment.
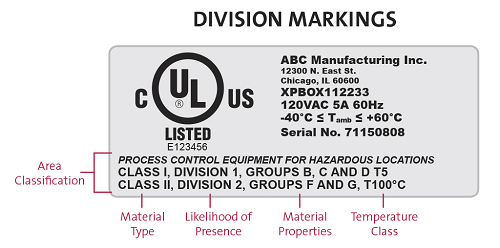 This image, from Underwriters Laboratories (UL), a large independent testing group, demonstrates the types of hazardous area certifications. When buying a tank level sensor for a hazardous environment, look for the logo of the certifying lab, like UL, and the subsequent certification ratings. UL and the UL logo are trademarks of UL LLC ©2020.
Next, you need to ensure proper grounding before installing any new devices. Tanks need to be grounded to avoid unwanted electrical discharge, which can create both safety and sensor quality concerns. For instance, if tanks have conductive liquids and sensors are submerged in tanks, static electricity can build up in tank walls and discharge into sensors if there is no other path to ground.
The risk is even higher for plastic tanks mounted on plastic containments. Plastic is a great insulator, which means plastic tanks can build up static charge, particularly in dry environments. We’ve seen lots of static buildup in remote oilfields in West Texas where it’s dry and windy. Even more concerning is that static buildup can discharge into people and create a spark, which, beyond dealing a jolt of pain to the individual, can create an additional explosion risk in hazardous environments.
So, ground your tanks if they aren’t already grounded. We recommend 6 gauge insulated copper wire with a grounding rod or plate for outdoor environments. You could also use existing electrical grounds at your facility.
When installing tank level sensors on plastic tanks sitting on plastic containments, we strongly recommend creating a grounding path for static electricity to safely discharge.
How you install a remote tank level monitoring system may seem trivial at first glance. After all, your primary concern is what happens once your IoT sensors are up and running. BUT, safe and well-planned installations can go a long way to making sure you can collect reliable and trustworthy data over the long term and keeping your people out of harm’s way.
Looking for a reliable, easy-to-install tank level sensor? Click here to learn more about our hazardous area-certified wireless tank level monitoring system.